Starting a yoga practice with back health in mind can feel like a delicate balance. You want the benefits—increased flexibility, strength, and calm—but the fear of tweaking or straining your back is real. The good news is that yoga is inherently adaptable. The classic poses you see in class are templates, not mandates. By learning a few key principles of modification, you can build a practice that supports and nurtures your spine, turning yoga into a reliable ally for your back.
This approach isn't about doing less; it's about doing what's right for your body. It's the difference between forcing your shape into a pose and allowing the pose to shape itself around your needs. With mindful adjustments, you create a practice that builds resilience from the ground up.
Why modify yoga poses for your back?
Your spine is a complex structure of bones, discs, nerves, and muscles. A one-size-fits-all approach to movement ignores this individuality. Modifications aren't a sign of weakness or limitation; they're a tool for intelligent, sustainable practice. They allow you to experience the intended action of a pose—like lengthening, twisting, or strengthening—without compromising your spinal alignment or safety. This is especially crucial for beginners, as it builds body awareness and creates positive movement patterns from the start.
Think of modifications as personalized steering for your practice—they help you navigate the pose safely to reach your destination of feeling better.
Foundational principles for a back-friendly practice
Before we get to specific poses, anchor your practice in these core ideas. They'll guide every choice you make on the mat.
Listen to sensation, not just shape. Discomfort from stretching a tight muscle is different from sharp, shooting, or pinching pain, especially in the spine or joints. The former is often a signal of growth; the latter is a clear stop sign. Your practice should feel like a gradual opening, not a forceful compression.
Prioritize length over depth. In almost every pose, the primary goal for back health is to create space along the spine. Imagine lengthening from your tailbone through the crown of your head. This often means taking a smaller range of motion with impeccable alignment rather than pushing into the deepest expression of a pose.
Engage your core support. Your abdominal and deep core muscles act as a natural corset for your spine. Gently drawing your navel toward your spine (without holding your breath) during poses provides stability and takes passive pressure off your lower back.
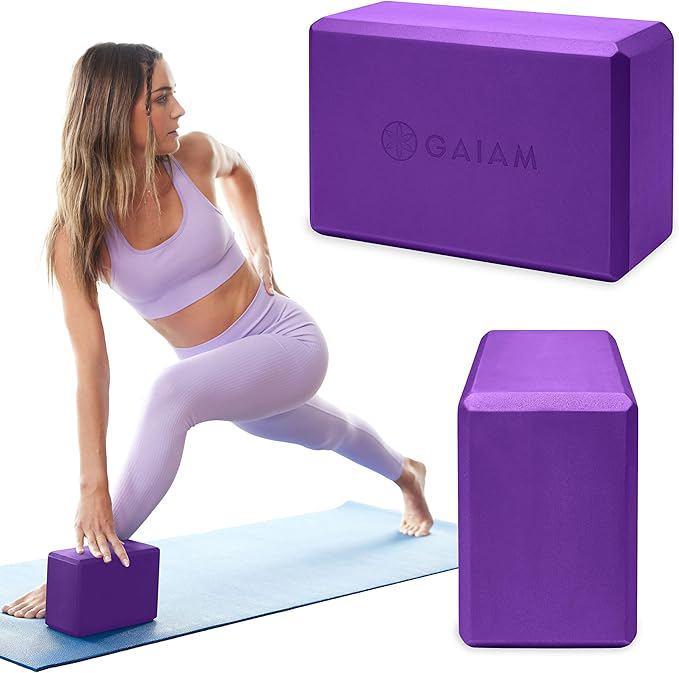
Use props without hesitation. Blocks, straps, bolsters, and blankets are not crutches. They are brilliant tools that bring the floor closer to you, extend your reach, and provide support, allowing your body to relax into a safe position.
Practical modifications for common beginner poses
Let's apply those principles. Here are some of the most common beginner poses and how to adapt them for back comfort and safety.
Forward Fold (Uttanasana)
The classic standing forward bend can strain the lower back if the hamstrings are tight, causing the spine to round forcefully.
- Modification: Keep a generous bend in your knees. This allows your spine to stay long and neutral. Place your hands on blocks in front of your feet instead of reaching for the floor.
- Focus: Feel the lengthening from your hips, not the rounding from your mid-back. Let your head hang heavy.
Downward-Facing Dog (Adho Mukha Svanasana)
This full-body pose can dump weight into the shoulders and round the upper back if not set up well.
- Modification: Bend your knees deeply. Focus on pushing your hips up and back, creating a long line from your wrists to your tailbone, even if your heels are far from the floor. Use blocks under your hands to reduce the angle if you have wrist sensitivity.
- Focus: Spinal length. It's better to have a V-shape with bent knees than an inverted U with a rounded back.
Seated Forward Bend (Paschimottanasana)
A prime example where forcing the fold can stress the lumbar discs.
- Modification: Sit on a folded blanket or firm cushion to tilt your pelvis forward. Keep your knees bent, perhaps with a rolled blanket underneath them for support. Loop a strap around the balls of your feet and hold the strap with straight arms.
- Focus: Hinging from the hips while maintaining the natural curve in your lower back. The strap lets you control the depth.
Bridge Pose (Setu Bandhasana)
This backbend can compress the lumbar spine if you lift too high, too quickly.
- Modification: Lift your hips only as high as you can while keeping your tailbone long. Squeeze a block between your thighs to engage the glutes and protect the lower back. For a restorative version, place a block under your sacrum (the flat triangular bone at the base of your spine).
- Focus: Lifting the hips from the strength of your glutes and hamstrings, not by crunching your lower back.
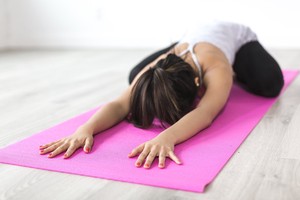
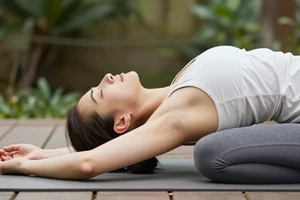
Child’s Pose (Balasana)
Even this restful pose can be uncomfortable for the back or knees.
- Modification: Widen your knees to make space for your belly. Place a bolster or stacked pillows from your seat to your forehead to fully support your torso. If your forehead doesn't reach the floor, use a block or book.
- Focus: Complete surrender and relaxation of the back muscles. The support allows your spine to decompress gently.
Building a mindful routine
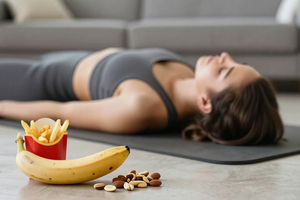
How you sequence your poses matters as much as the poses themselves. Start with gentle movements to warm up the spine, like Cat-Cow stretches. Move slowly and with control. After poses that compress the spine (like forward folds), follow them with a gentle counter-pose (like a gentle backbend on your stomach or a supported bridge). Always end with a few minutes of final relaxation (Savasana), allowing your back to settle and integrate the work.
Remember, the most advanced yoga practice is the one that meets you where you are with kindness and intelligence. By honoring your back's needs through thoughtful modification, you're not missing out on yoga—you're practicing its most essential lesson: mindful awareness of the body you have today.


![Tumaz Yoga Strap/Stretch Bands [15+ Colors, 6/8/10 Feet Options] with Extra Safe Adjustable D-Ring Buckle, Durable and Comfy Delicate Texture - Best for Daily Stretching, Physical Therapy, Fitness](https://www.glowtheorylab.com/uploads/ad202604/d62cf3b7330d7d4a.webp)