
Lifting weights at home has plenty of perks—no waiting for a squat rack, no judgment, and you can blast your own playlist. But there is one big downside: there is no coach watching your back. Without a mirror that lies to you or a trainer calling out your mistakes, poor form can go unnoticed until pain shows up.
The good news is you don't need a gym membership or a spotter to clean up your technique. You just need a few smart strategies and the willingness to be honest with yourself. Here is a practical, no-fuss guide to checking your own weightlifting form when you are training solo.
Why form really matters for home lifters
Bad form is the fastest way to turn a productive set into a setback. When your spine rounds during a deadlift or your knees cave in on a squat, you are not just cheating your muscles—you are loading your joints and connective tissue in ways they were not designed to handle. Over time, that adds up to overuse injuries or sharp, sudden pain.
Training at home often means lower weights and less external feedback, which can give you a false sense of safety. A 50-pound deadlift with a rounded lower back might feel fine for a few reps, but the cumulative stress is real. Checking your form isn't about perfection. It is about building a habit of awareness that keeps you lifting consistently for years, not just weeks.
Set up your recording station
Your phone is your best training partner here. Recording yourself is the single most effective way to spot form flaws you cannot feel while you are moving. You do not need fancy equipment. Prop your phone against a water bottle or a stack of books. If you have a tripod, even better.
Record from two angles: directly from the side and slightly behind at a 45-degree angle. The side view will show you things like bar path, spinal alignment, and how deep you are going. The rear angle helps you see asymmetries—like one shoulder hiking up or one hip dropping. Do at least one working set on film every session, even if it feels awkward at first.
Compare your footage to the standard cues
Now comes the honest part. Watch your video in slow motion and look for the specific cues that matter for each lift. Do not try to fix everything at once. Pick the one or two biggest issues and work on those until they feel automatic.
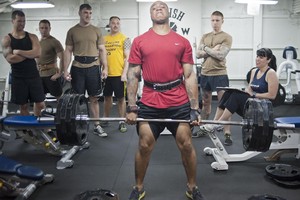
Deadlift checks
- Setup: Is your back flat before you pull? If your lower back is rounded, reset your hips higher and pull the slack out of the bar.
- Bar path: The bar should stay in contact with your shins and thighs the whole way up. If it drifts forward, you are likely starting with your hips too low.
- Lockout: Are you overextending at the top? Hips and shoulders should be vertical, not leaning back.
Squat checks
- Depth: Aim for hip crease below the knee, but do not sacrifice form to go deeper. If your lower back tucks under (butt wink), stop just above that point.
- Knee tracking: Do your knees cave inward? Focus on pushing your knees out toward your pinky toes as you come up.
- Bar path: The bar should travel in a straight vertical line over the middle of your foot. If you are leaning forward, work on ankle mobility or try a heeled shoe.
Overhead press checks
- Bracing: Are you squeezing your glutes and abs before you press? A soft core leads to an arched back and risk of shoulder impingement.
- Bar path: The bar should move straight up, not around your face. Try a wider grip if you are bumping your chin.
A quick tip: When you watch your video, pretend you are coaching a friend. It is easier to spot flaws in someone else's movement than your own. Be just as fair and helpful with yourself.
Use mirrors with caution
A mirror can be helpful, but it is not the gold standard. The problem is that looking at yourself in the mirror often makes you turn your head or shift your posture, which actually changes your form. A side-on mirror can also distort depth perception. Use the mirror for a quick glance to check foot placement or grip, but rely on video for real feedback.
Learn to feel the right positions
Video is great, but you also need to develop proprioception—the ability to sense where your body is in space. One way to build this is by practicing the bottom position of a squat or hinge without weight. Pause there for a few seconds and feel where your weight is on your feet, where your shoulders are, and whether your spine is neutral. Over time, this body awareness will cue you mid-lift without needing a screen.
Watch your recovery clues
Form is not just about what happens during the rep. Pay attention to how your body feels afterward. If you consistently have lower back soreness after deadlifting—not the good kind of muscle soreness but a deep, pinching ache—that is a red flag. Similarly, wrist or elbow pain on pressing days can point to a grip or bar placement issue that needs attention.
When to reset and rebuild
If watching your video reveals that your form is consistently off, do not be afraid to lower the weight. Drop down to a weight where you can nail the movement pattern for multiple sets. Think of it as an investment. Spending a few weeks at a lighter weight is much better than spending months rehabbing an injury. You can (and should) repeat this check-in process every few weeks, especially as you add weight to the bar.
Checking your form at home is a skill just like the lifts themselves. It requires patience, a little bit of humility, and a willingness to watch yourself on camera—which nobody loves. But the payoff is huge: safer workouts, better muscle activation, and the confidence that comes from knowing you are building strength on a solid foundation.