You roll out your mat, take a breath, and step into Downward Dog. But somewhere between your shoulders and hips, something feels off. Maybe your lower back is rounding, or your neck feels strained. That discomfort often traces back to something simple: you didn't check your posture alignment before you started moving.
In yoga, alignment isn't about achieving a picture-perfect shape. It's about creating a clear channel for your breath and movement. Before you can refine Warrior II or hold a smooth Plank, you need a baseline. Here is a practical, no-frills way to check your own posture alignment before you even move through your first Sun Salutation.
Why check your posture off the mat?
Your standing posture is your body's neutral blueprint. If you habitually stand with your hips shifted to one side or your head drifting forward, those habits travel directly into your yoga poses. A forward head, for example, often leads to neck strain in inversions or balance poses. A tucked pelvis in Tadasana (Mountain Pose) often shows up as a rounded lower back in Forward Fold.
Checking your posture before yoga lets you set a conscious starting point. You don't need to fix everything overnight. You just need to notice where you are so you can move with more awareness.
The wall test: your simplest alignment tool
You don't need a mirror or a teacher for this. You need a wall. The wall gives instant, honest feedback.
- Stand with your back to the wall, feet about hip-width apart and a few inches away from the baseboard. Let your heels, sacrum (the flat bone at the base of your spine), shoulder blades, and the back of your head all rest against the wall.
- Notice the spaces. Slide one hand behind the curve of your lower back. You should feel a small, natural space — about the thickness of your hand. If your lower back is pressing flat into the wall, your pelvis might be tucked under (posterior tilt). If you can fit your entire forearm into that space, your pelvis might be tilted forward (anterior tilt), which can create tension in the lower back.
- Check your head. Without moving your feet, feel the back of your skull against the wall. Is your chin jutting forward, or is the back of your head making contact? Most people need to gently tuck their chin to bring the skull to the wall. This is a sign of how much your head habitually carries forward.
- Feel your shoulders. Let your arms hang naturally. Are both shoulder blades resting evenly against the wall, or is one pulled forward or higher than the other?
A quick tip: after you step away from the wall, try to recreate that aligned feeling without the wall. This is your neutral posture baseline for practice.
Self-check your key alignment zones
Feet and ankles
Your foundation matters. Stand and look down at your feet. Is your weight shifting more to your heels or the balls of your feet? Are your arches collapsing inward (you'll see the inner ankle bone dropping down)? Try to distribute weight evenly across the four corners of each foot — the base of the big toe, the base of the pinky toe, the inner heel, and the outer heel. If your weight is always on your heels, you'll struggle to activate your legs in standing poses.
Pelvis and lower back
This is the most common area of confusion. Place your hands on your hip bones, fingertips pointing toward each other. Gently tilt your pelvis forward (like you're trying to stick your tailbone out) and then back (like you're tucking your tailbone under). Find the middle point where your hip bones and pubic bone are roughly level. That's your neutral pelvis. In yoga, most poses start from this neutral zone, not from an exaggerated tuck or tilt.
Shoulders and neck
Without moving your head, bring your awareness to your ears. Are they directly over your shoulders, or are they forward? A forward head posture often pulls the shoulders into a rounded, internally rotated position. Try this: lift your shoulders up to your ears, then squeeze them back and let them drop down and back. Notice where they settle. This relaxed, back-and-down position is your starting point for poses like Mountain Pose and Downward Dog.
Use your breath as a second gauge
Your breath is an alignment check that never lies. When your posture is close to neutral, your breathing will feel smoother and less effortful. If you notice your breath is shallow, jagged, or only filling your upper chest, scan your body. Is your jaw tight? Are your shoulders hunched? Is your lower back compressed? Soften those areas and see if your breath deepens. This is a real-time feedback loop you can use throughout your practice.
A quick pre-yoga alignment routine
Before your first pose, spend about two minutes on this sequence. It's designed to wake up your body's awareness.
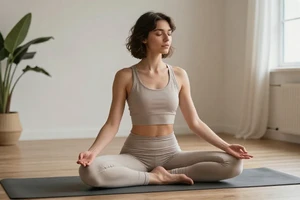
- Stand in Tadasana (Mountain Pose). Feet hip-distance apart, arms at your sides. Close your eyes and take three breaths. Notice where you feel tension. Adjust your weight slightly forward and back until you feel balanced.
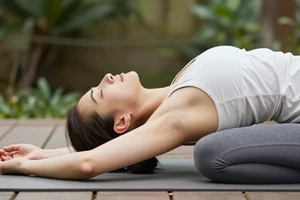
- Gentle neck rolls. Drop your chin toward your chest, then slowly roll your head to one side, then the other. Don't roll your head backward if you have neck issues — just side to side and forward.
- Shoulder circles. Lift your shoulders up, back, down, and forward in a slow circle. Do three in each direction.
- Pelvic tilts. Place your hands on your hips again. Do a few slow pelvic tilts forward and back, finding that neutral center.
- Re-do the wall test. Stand against the wall for 30 seconds. Feel the touch points. Then step away and move into your practice carrying that sensory memory with you.
What to do when you find misalignment
Discovering that your left shoulder is higher or your pelvis is off-kilter isn't a problem to fix immediately. It's information. In your yoga practice, you can use that information to modify poses. For example, if you know your head carries forward, actively press the back of your neck long in Downward Dog. If you notice that one hip is tighter, you can spend an extra breath in that side's version of a pose.
Alignment is a process, not a destination. Checking your posture before yoga isn't about achieving some textbook ideal. It's about showing up honestly and moving from a place of awareness instead of habit.