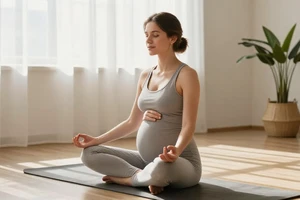

Prenatal yoga is often celebrated as a gentle, supportive practice during pregnancy, and for good reason. It can ease lower back tension, improve circulation, and help you connect with your changing body. However, the same hormones that make pregnancy possible—specifically relaxin—also increase joint laxity. When your yoga routine doesn't account for this shift, the hip joints can take the brunt of the strain.
Most instructors will tell you to listen to your body, but it's not always clear what you're listening for. Here are two specific, research-backed warning signs that your prenatal yoga routine may be placing too much demand on your hip joints, along with what you can do about it.
1. A Deep, Aching Sensation in the Groin or Outer Hip That Lingers After Class
It's normal to feel a good stretch during hip openers like Pigeon Pose or a wide-legged squat. What isn't normal is a deep, dull ache that hangs around for hours or even days after your session. This sensation, often described as a "toothache" in the joint, is a key indicator of joint irritation rather than healthy muscle release.
During pregnancy, rising levels of relaxin and estrogen cause ligaments—the tissues that connect bone to bone—to soften and stretch in preparation for childbirth. This process increases the range of motion in your hips, which sounds beneficial, but it also reduces the joint's structural stability. When you repeatedly push into the end range of a stretch, you aren't stretching muscle fibers as much as you are stressing the capsule of the hip joint itself.
Signals to watch: Pain that is sharp, pinching, or located deep in the fold of the groin. A sensation that the hip feels “loose” or unstable during standing poses like Warrior II.
What this means for your practice
This type of ache often signals hip impingement or capsular strain. If you feel it, reduce your depth in all hip flexion and external rotation poses. For example, in Pigeon Pose, keep the front shin at a sharper angle (closer to 90 degrees or less) rather than sliding your foot toward the opposite hip. In a squat, use a folded blanket under your heels or lower onto a prop so you aren't hanging from your hip sockets.
2. Clicking, Catching, or a Sensation of the Hip “Giving Way”
A smooth, pain-free joint moves without noise or friction. If your hip clicks, pops, or catches during a standing balance pose or as you transition through Downward Dog, it is a mechanical warning. While occasional, painless popping (known as crepitus) can be benign, clicking that is accompanied by instability or a feeling that the joint is shifting out of place is not.
This symptom is often linked to the iliopsoas tendon snapping over the femoral head or, more concerningly, to early signs of the hip joint struggling to maintain its natural ball-and-socket tracking. The hormonal softening of ligaments means the muscles around the hip must work overtime to keep the joint centered. If those muscles are fatigued or not firing correctly, the joint can become temporarily unstable.
Signals to watch: An audible clunk when lifting the leg to step forward. A sensation of grinding deep within the joint. Sudden sharp pain that makes you lose balance in a pose you previously held easily.
How to adjust
Stop any movement that causes the clicking or catching. Focus on stability work over flexibility. Instead of passive hip openers, practice active, controlled movements like:
- Clamshells with a resistance band (gentle, side-lying rotation to strengthen the gluteus medius).
- Standing hip circles with a light hold on a chair (small range of motion, no forcing).
- Supine pelvic tilts and bridges (to maintain core and glute engagement without loading the hip capsule).
Avoid single-leg balances like Tree Pose or Half Moon if they trigger the click. These poses heavily load the hip joint in a stable position, and if the joint is lax, that load can lead to micro-trauma.
Quick Reference: When to Modify or Skip a Pose
If you experience either of the warning signs above, these common prenatal yoga poses may need significant modification. The goal is to maintain a strong, stable practice—not to achieve maximum flexibility.
- Pigeon Pose: Keep the front leg at a less extreme angle; support the hip of the front leg with a blanket.
- Happy Baby: Keep the feet above the knees, not pulled toward the armpits. Keep the sacrum on the mat.
- Lizard Lunge: Keep the back knee down and the front shin vertical to avoid a deep hip flexor stretch.
- Garland Pose (Malasana): Sit on a block or bolster, allowing the knees to point forward rather than forcing them wide.
Building a Safer Prenatal Yoga Routine
Your prenatal practice should prioritize joint integrity over range of motion. The golden rule at this stage is to work at about 70–80% of your full range of motion—not your pre-pregnancy range. Just because you can put your foot behind your head doesn't mean your joint is equipped to handle that load right now.
Focus on poses that build endurance in the glutes, hamstrings, and core (the muscles that stabilize the hip). Poses like Cat-Cow, low-lunges with a block, and chair pose (Utkatasana) held for shorter durations with a focus on alignment are safer alternatives to deep hip rotations.
If the ache, clicking, or a feeling of instability persists after adjusting your routine for two weeks, or if it disrupts sleep or daily walking, consult a pelvic floor physical therapist or a healthcare provider familiar with pregnancy-related biomechanics. Ignoring these signals can lead to long-term joint issues such as hip dysplasia or labral tears, which are harder to treat after delivery.