Tight hips can creep up on you. Maybe you notice it when you get out of the car after a long drive, or when you lower yourself into a squat at the gym. For many people, that familiar pinch or ache in the hip joint is often met with a do-more mentality: push through, stretch harder, force the joint open. But the reality is that painful hips usually need a gentler, smarter approach.
The six exercises below are designed to improve hip mobility without triggering pain. They are backed by movement experts and physical therapists who understand that the hip joint is a remarkably stable ball-and-socket joint that can become restricted from prolonged sitting, repetitive movement patterns, or previous injuries. The focus here is on controlled range of motion, not aggressive stretching. If you feel a sharp or pinching sensation at any point, back off the range of motion immediately.
Why Your Hips Feel Stiff in the First Place
Hip stiffness rarely comes from one single cause. Over time, your hip capsule—the ligamentous structure that surrounds the joint—can lose its elasticity. The muscles that cross the hip, including the psoas, glutes, and piriformis, can become chronically tight or inhibited. If you sit for hours each day, your hip flexors shorten and your glutes switch off. This creates a tug-of-war that restricts your ability to extend, rotate, or flex the hip fully.
Many people respond to this tightness by lunging deeper or yanking on their leg during a hamstring stretch. That often aggravates the joint. A better approach is to mobilize the hip in a pain-free arc of motion, using your own muscles to control the movement rather than relying on external leverage or momentum.
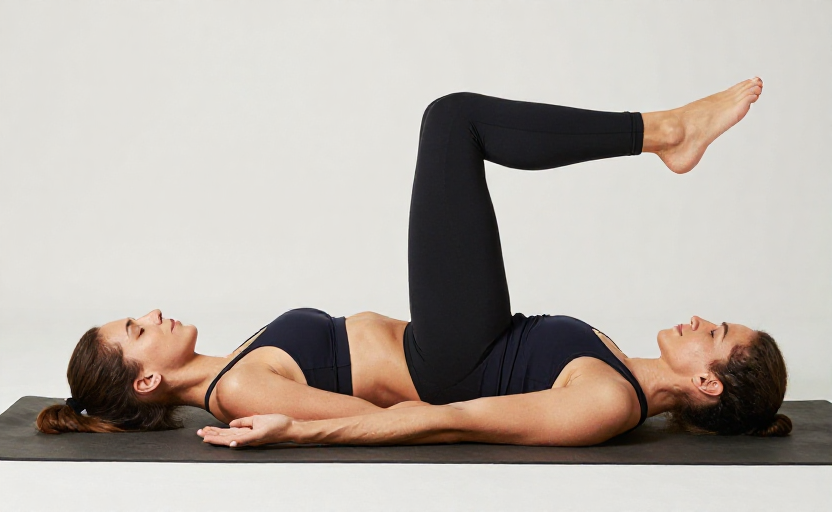
1. Supine Hip CARs (Controlled Articular Rotations)
This exercise comes from the world of physical preparation and is a favorite among movement specialists because it teaches you to actively control your hip through its available range. Lie on your back with both legs extended. Slowly draw your right knee toward your chest, then guide it out to the side, around, and back down to the floor in a circular motion. The diameter of the circle should be determined by where you feel a gentle stretch but no sharp pull or pinch.
Perform five slow circles in one direction, then reverse. The goal is not speed or size; it is consistent, smooth movement at the joint. This exercise helps re-lubricate the joint and trains your brain to trust a wider range of motion.
2. Seated 90-90 Hip Switches
This is a two-in-one mobility drill that addresses both internal and external rotation. Sit on the floor with your knees bent at 90 degrees. Your front leg should be rotated outward so your shin is parallel to your body, and your back leg should be rotated inward so your shin points straight back. Keep your spine tall and your sit bones grounded.
From this position, gently lift your back knee and rotate your entire lower body to the opposite side. Your front leg becomes the back leg, and vice versa. Move slowly and only as far as your hips allow without lifting your glutes off the ground. If you have very tight hips, you can place a small cushion or folded blanket under your sit bone on the tighter side. This drill teaches your hip capsule to transition between rotational states, which is essential for walking, running, and squatting.
3. Double-Knee Topple (Side-Lying Hip Internal Rotation)
Many people have plenty of hip external rotation but almost no internal rotation capacity. Restricted internal rotation often correlates with lower back pain and knee issues. Lie on your side with your hips and knees bent to 90 degrees, as if you are sitting in a chair lying down. Keep your ankles together and your feet on the floor.
Without moving your pelvis or lower back, slowly rotate the top thigh inward, letting your top knee drop toward the floor. Think of it as a gentle topple rather than an active push. Go only as far as you can while keeping your low back still and pain-free. Return to the start and repeat ten times on each side. This movement targets the deep rotators and the posterior capsule in a way that feels more like a release than a stretch.
4. Couch Stretch (Modified)
The full couch stretch—where you kneel with your shin pressed vertically against a couch cushion—can be too intense for sensitive hips. A safer entry point is a modified version. Stand facing a couch, bench, or sturdy chair. Place the top of your right foot on the seat, with your knee pointing downward. Your left leg stays planted forward in a lunge stance. Keep your torso upright.
Instead of sinking deeply into the stretch, use your glute on the back leg to gently pull your pelvis into a slight posterior tilt. This activates the muscle that lengthens the hip flexor, rather than just compressing the front of the hip. Hold for 30 seconds and breathe calmly. Switch sides. This version gently opens the front of the hip without jamming the joint.
5. Standing Hip Capsule Mobilization
This exercise is about creating distraction—a gentle separation of the joint surfaces—which can relieve pressure and improve mobility. Stand on your right leg and place your left foot on a low step, a yoga block, or a thick book. The height should be low enough that you feel no strain in your standing hip.
Keep your right leg straight and your foot flat. Shift your weight slightly forward and backward, letting your right hip move freely in the socket. You are not stretching; you are letting the joint oscillate. This micro-movement helps normalize the fluid pressure inside the hip capsule. Continue for 30 to 45 seconds, then switch legs. You should feel a sense of space in the hip rather than a pull.
6. Prone Butterfly Leg Lifts
Lying on your stomach tends to be comfortable for most people with hip pain because it takes the weight off the joint. Place a small folded towel under your forehead for comfort. Bring the soles of your feet together and let your knees fall outward into a butterfly position. Your legs should form a diamond shape.
Now, keeping your knees wide, lift both feet a few inches off the floor by engaging your glutes and low back muscles. Lower them back down with control. Do not clench your glutes aggressively; aim for a low-level, sustained contraction. Repeat ten times. This exercise strengthens the posterior chain while placing the hips in an externally rotated position. It builds endurance near the end range of motion, which helps prevent stiffness from returning quickly.
A simple rule for hip mobility: move only within the arc that feels smooth and pain-free. If the joint speaks up, listen. Back off slightly and let the movement become easier over time.
Putting It All Together
Consistency matters more than intensity when it comes to hip mobility. Doing these exercises three to four times per week, focusing on controlled and pain-free movement, will produce better long-term results than forcing a deep stretch once a week. Start with the first two exercises and gradually add the others as your hips respond well. If you have a known hip condition such as osteoarthritis, labral tears, or FAI, check with a physical therapist before starting a new mobility routine.
The goal is not to achieve a Instagram-worthy range of motion. It is to move through your day—walking, squatting, sitting cross-legged, climbing stairs—with less effort and more freedom. Pain-free hip mobility is about respecting your joint's current limits while steadily teaching it to move better.