When you’re training alone in your garage or living room, there’s no coach tapping your elbow into place. That silence can be deceptive: a small tilt of the hips or a shifted grip can snowball into a nagging injury over time. Checking your own form isn’t just about vanity—it’s the difference between building strength and working against yourself. These three expert-backed methods let you become your own spotter, no gym membership required.
Tip 1: Record and review with a critical eye
Your phone is already in your pocket. Set it up at hip height on a stable surface, perpendicular to your movement path—for squats and deadlifts, that means a side angle; for overhead presses, a 45-degree front angle captures shoulder and bar path well. Film two to three working sets at typical speed, then watch in slow motion. What to look for:
- Bar path – Is it traveling in a straight vertical line? In a bench press, the bar should touch your chest around the nipple line, not drift toward your neck.
- Joint alignment – Your wrists, elbows, and shoulders should stack under the load, not wobble inward or flare excessively.
- Hip hinge vs. squat wedge – In a deadlift, your hips should rise at the same rate as your shoulders. If your hips shoot up first, you’re turning the pull into a stiff-legged lift.
A single recording is a snapshot. Compare three sets across a week to separate a bad rep from a consistent flaw. This simple visual feedback is the same tool professional weightlifting coaches use, just scaled down to your screen.
Tip 2: Use tactile cues—touch and tension
Your muscles speak a language your eyes can’t always hear. Before you lift, place one hand on the target muscle group—lats before a pull-up, glutes before a squat, rhomboids before a row. Take a deep breath, brace your core as if someone were about to poke you in the stomach, and then initiate the movement. You’ll feel where the tension drops off.
A quick self-test: During a push-up, if your lower back sags, try squeezing your glutes and pulling your elbows closer to your ribs. The form cue “elbows 45 degrees” instantly protects your shoulders.
If you can’t feel the intended muscle working (for example, your lower back taking over in a bent-over row), pause and reset. Use a resistance band looped around your thighs during squats to keep your knees tracking over your toes—it’s a cheap, undeniable tactile cue. Tempo also helps: count “one-thousand-one, one-thousand-two” on the lowering phase. That three-to-four second eccentric forces your body to stabilize rather than bounce.
Tip 3: Exploit the mirror and the wall
You don’t need a full wall of mirrors. A single mirror at eye level (or a reflective glass door) gives you a real-time check on frontal-plane symmetry—are your shoulders level when you unrack the bar? Is your spine neutral? For movements where you can’t see yourself easily, use a wall as a boundary.
Wall drills for common issues:
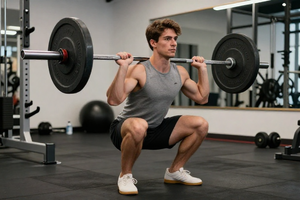
- Squat depth check – Stand with your back to a wall, heels six inches away. Squat until your glutes gently tap the wall—that’s the point where your hip crease drops below your knee. If you feel a hard stop from the wall before reaching depth, your ankles or hips need work.
- Overhead press path – Face a wall, holding a broomstick with a shoulder-width grip. Press overhead while keeping the stick from touching the wall. If it hits, your bar path is arcing forward instead of staying vertical.
- Deadlift hip height – Stand with your side to a wall, about six inches away. Set up for a deadlift and slowly pull until the bar reaches knee height. If your hip smacks the wall, you’re starting with your hips too high.
These drills leverage physical constraints to expose compensations your brain might ignore. They’re not replacements for professional coaching, but they’re remarkably effective for catching the mistakes that cause chronic lower back pain and shoulder impingement.
The beauty of these three tactics is that they layer together. Record a set, feel for muscle activation, then use a wall or mirror to confirm your eye. Over time, your internal sense of good form becomes automatic—and your lifts get safer, stronger, and more efficient.