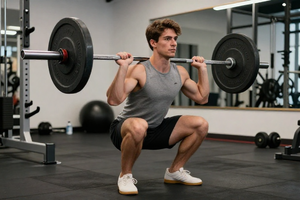

Deadlifting at home doesn't require a commercial gym membership or a garage full of shiny, expensive equipment. If you have the space to stand up straight and the desire to pull weight off the floor, you can build a functional home gym for deadlifts that respects both your bank account and your spine. This guide focuses on what you actually need—and what you can safely skip—when lifting heavy at home.
The key to a budget deadlift setup is prioritizing the load-bearing interface: the bar, the plates, and the floor. Everything else is optional. Let's walk through the essentials without the industry hype.
What is the absolute minimum setup?
You need three things to deadlift: something to hold, something to load, and a surface that won't break. If you are lifting modest weights (under 300 lbs for most people), a basic Olympic barbell, a set of iron plates, and a concrete floor work perfectly fine. The largest expense will be the barbell. Do not buy a cheap bar with a 28 mm shaft that bends easily—look for a budget bar with a 28.5–29 mm shaft and a 150,000 PSI tensile strength rating. This will handle progressive overload for years without losing its whip.
If your floor is finished wood, tile, or carpet, a deadlift platform is a must—you do not need to build one. Horse stall mats from a farm supply store are the budget gold standard for protecting the floor.
Platform or no platform? The cost-benefit analysis
A deadlift platform is a wooden sandwich that absorbs impact and protects the floor. For deadlifts under 405 lbs, you can skip the plywood layers and simply use two layers of ¾-inch rubber stall mats. For heavier pulls, a three-layer platform (rubber over plywood over rubber) prevents the concrete from cracking over time. Total cost for a simple two-layer rubber mat setup: around $80–100 for a 4x6 foot area. That is cheaper than most single pieces of gym equipment.
When you can skip a platform entirely
If you deadlift on a concrete slab in your garage or basement and you aren't dropping the bar from lockout—i.e., you control the eccentric—you may not need any platform at all. Just put the bar down gently and the concrete will hold up for years. Dropping a heavy deadlift repeatedly on bare concrete will eventually cause micro-cracks, so be honest with yourself about your lowering habits.
Choosing plates without breaking the bank
Standard iron plates are the cheapest per pound you can buy. Bumper plates are overrated for deadlifts unless you are doing olympic lifts or repeatedly dropping from overhead. For deadlifts, iron plates work perfectly. Shop secondhand marketplaces first—many people sell their pandemic-era home gym equipment for pennies on the dollar. Avoid plastic-encased cement plates; they break and the weight is often inaccurate by a pound or more per plate.
- Bumper plates: Only consider these if you plan to do power cleans or snatches. Otherwise, skip them entirely.
- Iron plates: Best value. Expect to pay $0.50–$0.80 per pound used. New sets of 255 lbs run around $200–300.
- Change plates: Buy small 2.5 lb and 5 lb plates for incremental loading. Micro-plates (1.25 lb) are useful for stalling strength but not essential early on.
The barbell is not the place to save $50
A bad bar will ruin your deadlift technique and eventually become dangerous. The cheap budget bars from big-box sporting goods stores often have sleeves that spin inconsistently, loose collars, and low tensile strength that causes permanent bending within a year. A good entry-level bar costs $150–$250. Specifically, look for a bar with dual knurl marks (for both conventional and sumo stance), a center knurl (for grip on back squats if you also squat), and a warranty of at least one year.
If the bar bends even slightly during a deadlift, stop using it immediately. A bent bar will redistribute weight unevenly and increase injury risk.
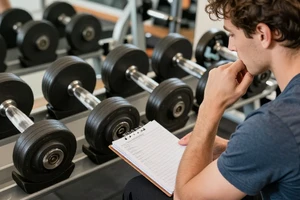
What about racks, straps, and accessories?
You do not need a squat rack to deadlift. You simply pull from the floor. However, if you plan to also squat, a simple squat stand or a rack for $100–200 is helpful. For deadlifts specifically, these budget-friendly extras make the biggest difference:
- Lifting chalk: Cheap ($5–10) and dramatically improves grip, especially if you have sweaty hands.
- Deadlift slippers or flat-soled shoes: Do not deadlift in running shoes with thick, squishy soles. Barefoot, deadlift slippers, or low-top converse-style flat shoes work best. Cost: $0 if you just take off your shoes.
- Lifting straps or hook grip: Straps are $10–15 and let you pull more weight than your grip strength can handle alone. Hook grip is free but painful at first.
Flooring mistakes that cost you more later
The most common budget mistake is using old carpet, yoga mats, or foam tiles under a deadlift platform. These materials compress unevenly, causing the bar to roll or the floor to take uneven force. Stick to rubber stall mats (1/2-inch to 3/4-inch thickness) placed directly on concrete. Do not lay them on top of soft underlayment. For an even cheaper option, you can use a single 4x6 foot sheet of 3/4-inch plywood as a base, but you will need to sand and paint it to avoid splinters.
Recommended budget setup for deadlifts only (under $400)
- Barbell: Budget shaft bar with 150,000 PSI tensile strength (~$150–200).
- Plates: 255 lbs of used iron plates (~$150–200).
- Flooring: Two 4x6 foot horse stall mats (~$80–100).
- Optional: Chalk ($5) and flat shoes (already owned).
Total: $385–500. That is less than six months of an average gym membership, and you own everything you need for life. If you already own some of these items, you can get started for under $200.
What about progressive overload without a rack?
You can load the bar easily on the floor. The hardest part is lifting the barbell to knee height to add plates if you have a standard barbell and plates with a small hole. Use a pair of small cinder blocks or a low bench to rest the bar on while you load weight. This is a low-tech solution that costs a few dollars. Alternatively, buy a set of plates with larger holes (50 mm standard for Olympic bars) so they slide on easily—most iron plates already have this.
Storage and space considerations
A deadlift setup takes up very little floor space: roughly 8 feet by 6 feet for the lift itself. Store the barbell vertically in a corner or horizontally on a cheap barbell rack (around $40). Plates stack in a wooden plate tree you can build from scrap lumber for under $20, or buy a budget tree for $50–70. Be mindful of the ceiling height if you are tall—you need clearance to stand with the barbell extended overhead. Standard 8-foot basement ceilings are usually fine for most adults up to 6'2" tall unless you are doing overhead pressing.