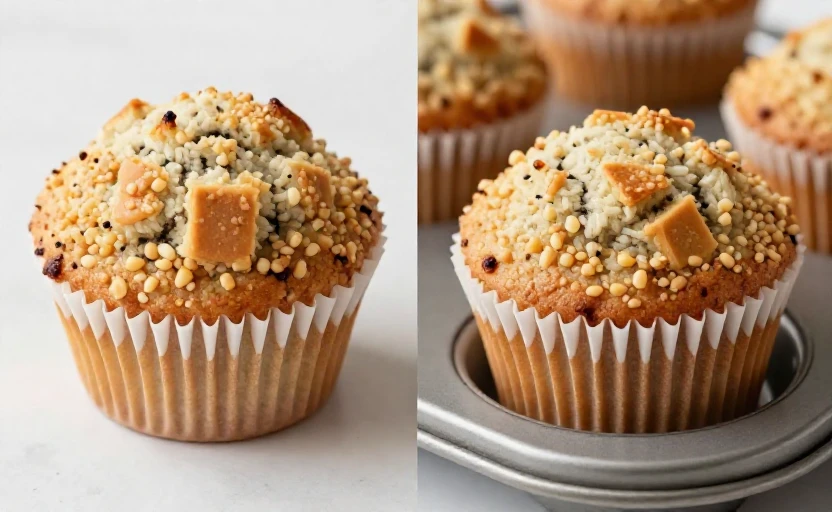
There’s a particular disappointment that comes from pulling a batch of gluten-free muffins from the oven, only to find them crumbly, dense, and dry. You followed the recipe, swapped the flour, and yet the result feels more like a sweetened hockey puck than a tender treat. If this sounds familiar, you’re not alone. The culprit is often one fundamental oversight in the gluten-free baking process—an easy mistake to make, but even easier to fix once you understand the science behind it.
Gluten-free baking isn't just a simple one-to-one substitution. It's a different culinary language. Where traditional wheat flour provides structure and elasticity through gluten proteins, gluten-free flours are a collection of individual starches and proteins that don't naturally bind together. The most common mistake bakers make is treating them like a direct swap, leading to a parched final product. The secret to moist, delicious gluten-free muffins lies not just in the flour blend you choose, but in how you manage the moisture within your batter.
Why Gluten-Free Batters Lose Moisture
Think of wheat gluten as a stretchy, moisture-trapping net. In a muffin batter, it holds onto liquid and steam during baking, contributing to a soft, springy crumb. Most gluten-free flour blends, however, are predominantly made up of starches (like rice flour, tapioca starch, or potato starch). These starches are thirsty. They absorb liquid rapidly, but without the gluten network to hold it, that moisture can either evaporate too quickly in the oven's heat or lead to a gummy, dense texture if overcompensated.
The mistake, then, is assuming your batter's consistency should mirror that of a traditional wheat-based batter. A gluten-free muffin batter should typically be thicker and more viscous. If it pours easily like cake batter, it likely lacks the structural components to trap steam effectively, and the starches will over-absorb, leaving you with a dry muffin.
A gluten-free batter that looks like traditional cake batter is often a warning sign for dryness.
The Hydration Balancing Act
Correcting the dry-muffin error revolves around mastering hydration. This involves both the amount of liquid and the ingredients that help retain it.
First, consider your wet ingredients. Eggs, oils, dairy, and purees like applesauce, pumpkin, or mashed banana do more than add flavor; they donate and bind moisture. In many successful gluten-free recipes, you'll see an increase in these elements compared to their gluten-containing counterparts. A touch more fat, like oil or melted butter, can coat the starch molecules and slow down their moisture-absorption rate, leading to a more tender crumb.
Second, resting your batter is a non-negotiable step many skip. After mixing your dry and wet ingredients together, let the batter sit for at least 30 minutes at room temperature. This allows the flours and starches to fully hydrate, absorbing the liquid evenly before baking. Skipping this rest means the starches will continue absorbing liquid in the oven, pulling it away from the crumb and creating dryness.
Binders Are Your Best Friend
Since there's no gluten to provide structure, you must add it back in. This is where binders like xanthan gum or guar gum come in. These ingredients mimic gluten's elastic, binding properties, helping to trap air and moisture. Most pre-mixed gluten-free flour blends already contain a binder, but if you're mixing your own, adding 1/2 to 1 teaspoon of xanthan gum per cup of flour is standard. Without it, your muffins will lack cohesion and dry out quickly.
Practical Tips for Perfectly Moist Muffins
- Don't Overmix: Once combined, stop stirring. Overmixing can lead to tunneling and a tough texture.
- Check for Doneness Early: Gluten-free muffins often bake faster. Start checking a few minutes before the recipe's suggested time. A toothpick inserted should come out with a few moist crumbs, not completely clean.
- Embrace the Add-Ins: Ingredients like chocolate chips, berries, or shredded zucchini introduce pockets of moisture that permeate the crumb.
- Store Them Right: Gluten-free baked goods stale faster. Cool completely, then store in an airtight container at room temperature for a day or two, or freeze for longer storage.
Baking delightful gluten-free muffins is absolutely within reach. By shifting your focus from a simple flour substitution to actively managing hydration and structure, you can avoid the common pitfall of dryness. Remember to let your batter rest, trust in binders, and don't be afraid of a thicker batter. Your reward will be a batch of muffins with a tender, moist crumb that everyone can enjoy.